A worn or damaged serpentine belt can lead to charging issues, overheating, power steering loss, and sudden breakdowns. Fortunately, replacing a serpentine belt is a straightforward repair on most vehicles when performed carefully and in the correct order.
Before starting, allow the engine to cool completely and review the routing diagram for your specific vehicle.
Tools and Materials Needed
Before beginning the replacement, gather the following tools and parts:
Replacement serpentine belt (correct length and rib count)
Serpentine belt tool or long-handled ratchet
Appropriate socket (commonly 14mm or 15mm)
Flashlight or work light
Gloves and eye protection
In some cases, a breaker bar may help provide additional leverage.
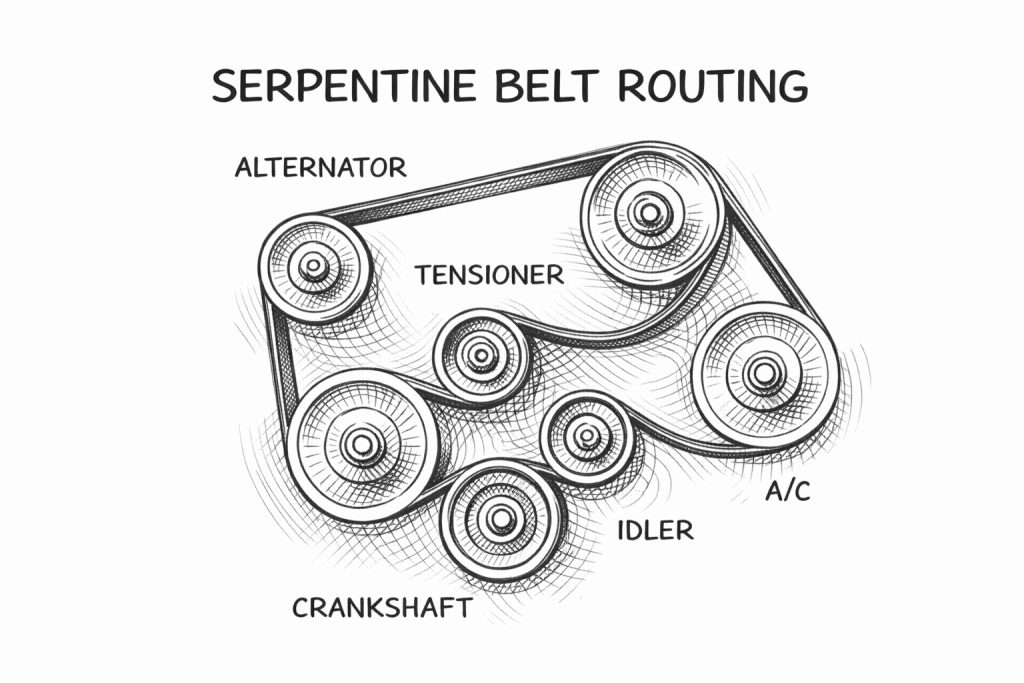
Step 1) Locate the Serpentine Belt Routing Diagram
First, open the hood and locate the belt routing diagram. This diagram is usually found on:
The radiator support
The fan shroud
The underside of the hood
If the diagram is missing, consult the owner’s manual or manufacturer documentation before proceeding.
Serpentine belt routing diagram showing belt path across engine pulleys.
Step 2) Identify the Belt Tensioner
Next, locate the automatic belt tensioner. This spring-loaded pulley maintains proper belt tension during operation.
Typically, the tensioner:
Has a smooth pulley face
Includes a square drive or bolt head for tool engagement
At this stage, confirm which direction the tensioner rotates to release tension.
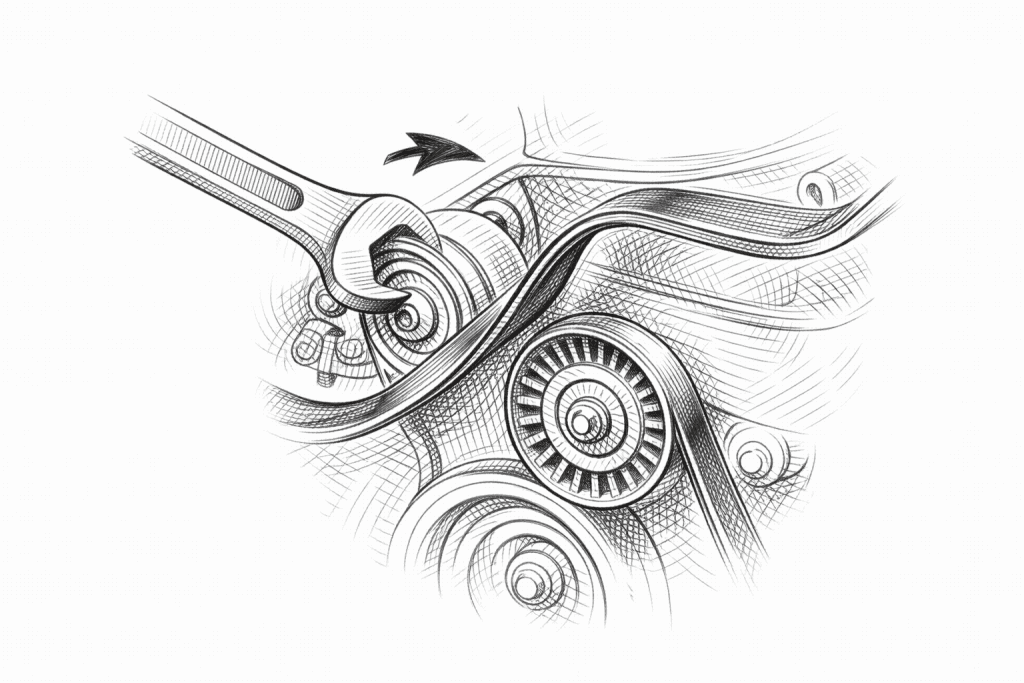
Step 3) Relieve Belt Tension
Now, install the serpentine belt tool or ratchet onto the tensioner. Slowly rotate the tensioner in the correct direction to relieve tension.
While holding the tensioner back:
Slide the belt off one pulley only
Carefully release the tensioner to its resting position
⚠️ Do not allow the tensioner to snap back abruptly, as this can damage internal components.
Wrench rotating the serpentine belt tensioner while the belt slips off a pulley.
Step 4) Remove the Old Serpentine Belt
Once tension is released, remove the belt completely from all pulleys. As you do this, take a moment to inspect the belt path.
At this point, check for:
Cracks across the ribs
Fraying along the edges
Missing rib sections
Glazing or shiny surfaces
These signs confirm the belt was due for replacement.
Step 5) Inspect Related Components
Before installing the new belt, it’s important to inspect all pulleys and driven accessories.
Specifically, check:
Idler pulleys for noise or wobble
Tensioner pulley for smooth rotation
Alternator, power steering, and A/C pulleys for alignment
If a pulley feels rough or loose, address it before installing the new belt.
Step 6) Route the New Serpentine Belt
Next, compare the new belt to the old one to confirm length and rib count match.
Following the routing diagram:
Begin routing the belt around the crankshaft pulley
Continue around all driven accessories
Leave the easiest pulley for last (often the tensioner or idler)
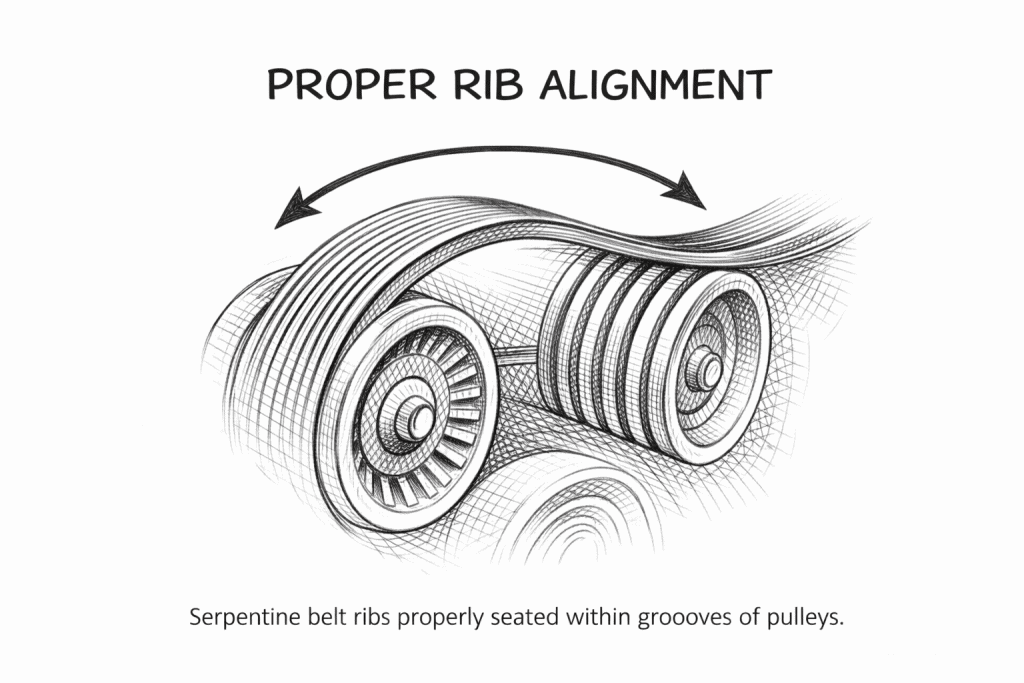
Make sure the belt ribs seat fully into grooved pulleys.
Step 7) Apply Tension and Install the Belt
At this stage, rotate the tensioner again to allow the belt to slide over the final pulley.
Once the belt is fully seated:
Slowly release the tensioner
Visually confirm the belt is centered on every pulley
If the belt appears misaligned, correct it before starting the engine.
Step 8) Verify Belt Alignment
Before closing the hood, take a final look at the belt path.
Specifically:
Confirm the belt sits squarely in all pulley grooves
Ensure no ribs are riding on pulley edges
Verify the belt follows the routing diagram exactly
This step helps prevent premature belt wear or noise.
Step 9) Start the Engine and Inspect Operation
Finally, start the engine and observe the belt while idling.
Although serpentine belt replacement is considered a routine repair, careful installation is essential. By following these steps in order and verifying alignment before driving, you can prevent belt noise, slippage, and accessory damage.
If anything appears unclear or abnormal during the process, stop and consult a qualified technician.
This platform analyzes depreciation trends, resale value behavior, and long-term ownership costs, helping drivers understand how mileage, maintenance, and timing shape real financial outcomes.