Ignition coils convert battery voltage into the high voltage your spark plugs need to fire. When a coil weakens or fails, you’ll usually feel it immediately: rough idle, loss of power, hesitation under load, hard starts, and sometimes a flashing check engine light (active misfire). This guide walks you through a clean, correct ignition coil replacement workflow that applies to most modern coil-on-plug (COP) engines.
When to Replace an Ignition Coil
Common symptoms:
Rough idle or shaking at stops
Hesitation, surging, or loss of power
Check engine light (often flashing during misfire)
Poor fuel economy
Fuel smell from the exhaust (unburned fuel)
Common diagnostic codes:
P0300 (random/multiple misfire)
P0301–P0308 (misfire cylinder-specific)
P0351–P0362 (ignition coil circuit codes vary by vehicle)
If the check engine light is flashing, avoid driving hard. Persistent misfires can overheat and damage the catalytic converter.
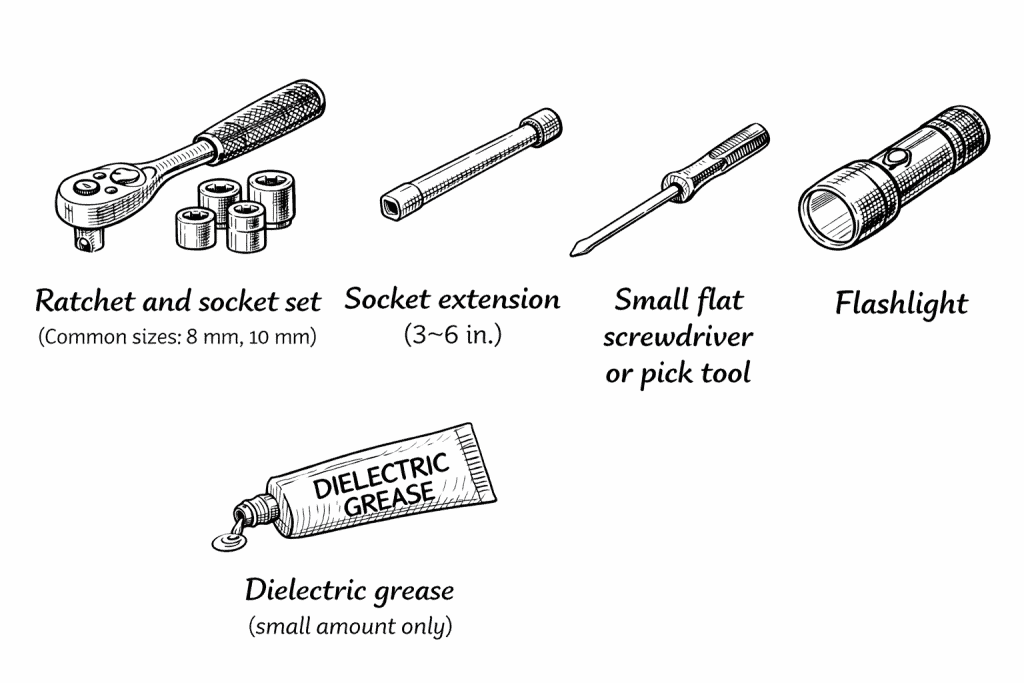
Tools and Parts You’ll Need
Tools:
Ratchet and socket set (commonly 8mm, 10mm, 12mm)
Extension(s) (3″–6″)
Torque wrench (recommended)
Small flat screwdriver or pick (connector release)
Dielectric grease (small amount)
Flashlight
Parts
Replacement ignition coil(s) (match your engine and cylinder count)
Optional: new spark plugs (recommended if plugs are due)
Optional: coil boot(s) if your vehicle uses serviceable boots
Safety and Prep
Park on a flat surface, set parking brake, and let the engine cool.
If you’ll be working near the starter cable, alternator, or exposed wiring, disconnect the negative battery terminal.
Work clean: ignition systems hate dirt and moisture.
Replacing The Ignition Coil (Coil-On-Plug)
Step 1: Confirm the correct cylinder (recommended)
If you have a code like P0302, that points to cylinder 2 misfire on many vehicles (cylinder numbering varies by engine layout). If you’re not sure, look up your engine’s cylinder numbering diagram.
Quick confirmation trick (optional): If the engine is misfiring on a specific cylinder and you can access coils easily, you can swap the suspected coil with another cylinder, clear codes, and see if the misfire follows the coil. If it does, the coil is likely the issue.
Step 2: Remove the engine cover (if equipped)
Many vehicles have a plastic cover held by:
push pins,
10mm nuts,
or simple grommets (pull upward evenly).
Set it aside where it won’t get stepped on.
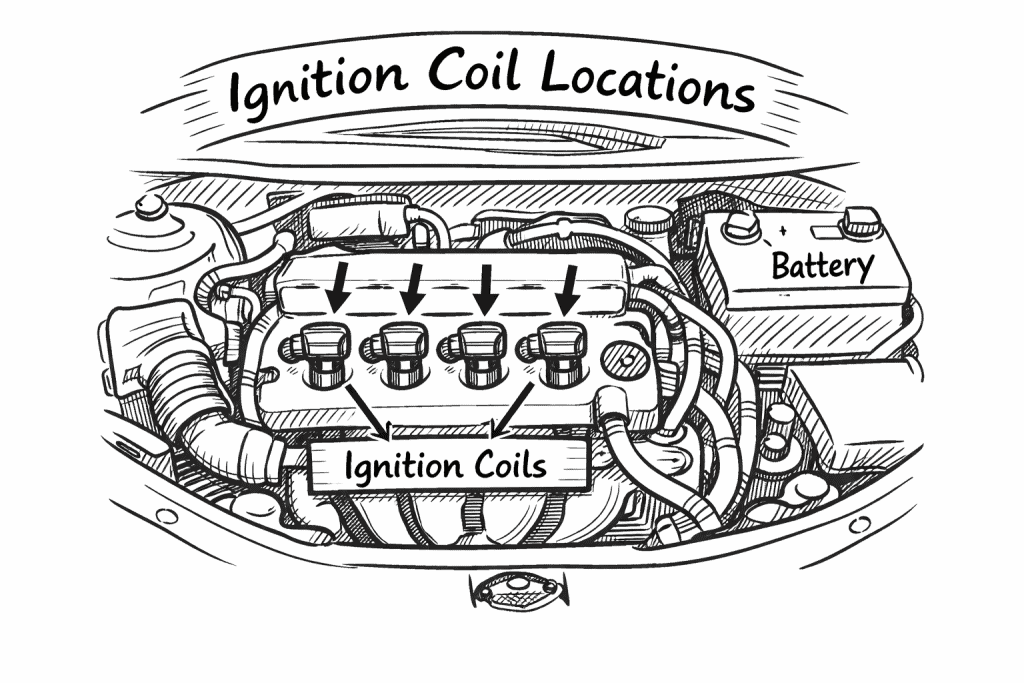
Step 3: Locate the ignition coil(s)
Most modern 4-cylinder engines have one coil per cylinder on top of the valve cover. V6/V8 engines may have coils on both banks and sometimes tighter access.
Look for:
a small electrical connector,
one mounting bolt,
a rubber boot going into the spark plug well.
Step 4: Disconnect the coil electrical connector (do not force it)
This is where most DIY damage happens.
Press the connector lock tab (or slide the safety lock if present).
Pull the connector straight back.
If stuck, gently wiggle—don’t yank wires.
Step 5: Remove the coil retaining bolt
Remove the coil bolt (commonly 8mm or 10mm). Keep it somewhere safe.
Some coils have no bolt and are retained by friction; in that case, skip to the next step.
Step 6: Remove the ignition coil
Grip the coil body and pull straight upward. If it’s stuck:
rotate slightly to break the boot seal,
then pull straight up.
Avoid aggressive side-to-side prying—plastic housings can crack.
Step 7: Inspect the coil boot and spark plug well
Look for:
oil in the spark plug tube (possible valve cover tube seal leak),
water intrusion,
carbon tracking (thin black lightning-like lines),
torn boot or swollen rubber.
If there’s oil pooled in the well, replacing the coil alone may not last. Clean it carefully and plan to address the leak.
Step 8: Prep the new coil (dielectric grease: use a tiny amount)
Apply a small dab of dielectric grease inside the coil boot (on the rubber interior lip). Do not smear it on the electrical pin or flood the boot. The goal is moisture protection and easier future removal—not conductivity.
Step 9: Install the new coil
Align the boot with the spark plug tube.
Press straight down firmly until fully seated.
If the coil feels “springy” and won’t sit flush, it may be misaligned.
Step 10: Reinstall and tighten the retaining bolt
Thread the bolt by hand first to avoid cross-threading. Then snug it down.
If you have the factory torque spec, use it. Over-tightening can strip threads in aluminum valve covers or brackets.
Step 11: Reconnect the electrical connector
Push the connector in until it clicks or locks. If there’s a secondary lock, re-engage it.
Do a quick tug test—light pull to confirm it’s locked.
Step 12: Reassemble and test
Reinstall engine cover.
Reconnect negative battery terminal if disconnected.
Start the engine and let it idle.
What you want:
smooth idle,
no misfire shake,
no flashing check engine light.
If you have a scan tool, clear the codes and monitor misfire counters live.
If the Misfire Comes Back After Replacing the Coil
Most common causes (in order):
Bad/old spark plug (replace plugs if overdue)
Coil connector or wiring issue (broken lock, corrosion, stretched wires)
Vacuum leak near that cylinder
Fuel injector issue (clogged or failing injector)
Compression/mechanical problem (less common but serious)
If you replaced one coil and the vehicle is high mileage, it’s normal to see other coils fail later. Some people replace coils in sets, but it’s not always necessary if budget matters.
References and Useful Resources (visitor-friendly)
If you want a more “repair-manual style” reference for your exact vehicle, the most accurate source is the manufacturer service manual for torque specs and cylinder numbering.
This platform analyzes depreciation trends, resale value behavior, and long-term ownership costs, helping drivers understand how mileage, maintenance, and timing shape real financial outcomes.