Replacing a cabin air filter is one of the simplest maintenance tasks you can do, yet it has a noticeable impact on air quality inside your vehicle. This filter cleans the air entering the cabin through the heating and air conditioning system, trapping dust, pollen, and other airborne particles. Most drivers can complete this task in under 15 minutes with no special tools.
What a Cabin Air Filter Does (and Why It Matters)
The cabin air filter prevents outside contaminants from entering the interior of your vehicle through the ventilation system. When the filter becomes clogged, airflow is reduced and air quality suffers.
A clean cabin air filter helps:
✔ Reduce dust and pollen inside the vehicle
✔ Improve airflow from vents
✔ Support proper HVAC performance
✔ Create a more comfortable driving environment
What You’ll Need Before You Start
Before beginning, gather the following:
✔ A replacement cabin air filter designed for your vehicle
✔ Your vehicle owner’s manual if you’re unsure of the filter location
Cabin air filters are vehicle-specific, so always confirm the correct size and orientation for your model.
Step 1: Park the Vehicle and Turn Everything Off
Park the vehicle on a flat surface and turn the engine off completely. Make sure the climate control system is switched off before starting. This prevents debris from being pulled into the system while the filter is removed.
Step 2: Locate the Cabin Air Filter Housing
On most vehicles, the cabin air filter is located behind the glove box.
On most vehicles, it’s a narrow rectangular slot behind the glove box.
In many cases, you’ll find:
✔ A plastic access panel
✔ Clips or tabs holding the housing in place
If you’re unsure of the exact location, consult your owner’s manual for guidance.
Step 3: Access the Filter Compartment
Open the glove box and gently press in on the sides to allow it to drop down. Some vehicles require removing a small damper arm or releasing retaining tabs.
Once lowered, the filter housing cover should be visible. Carefully remove the cover to expose the filter.
At this point, you should be able to clearly see the filter housing before removing the filter.
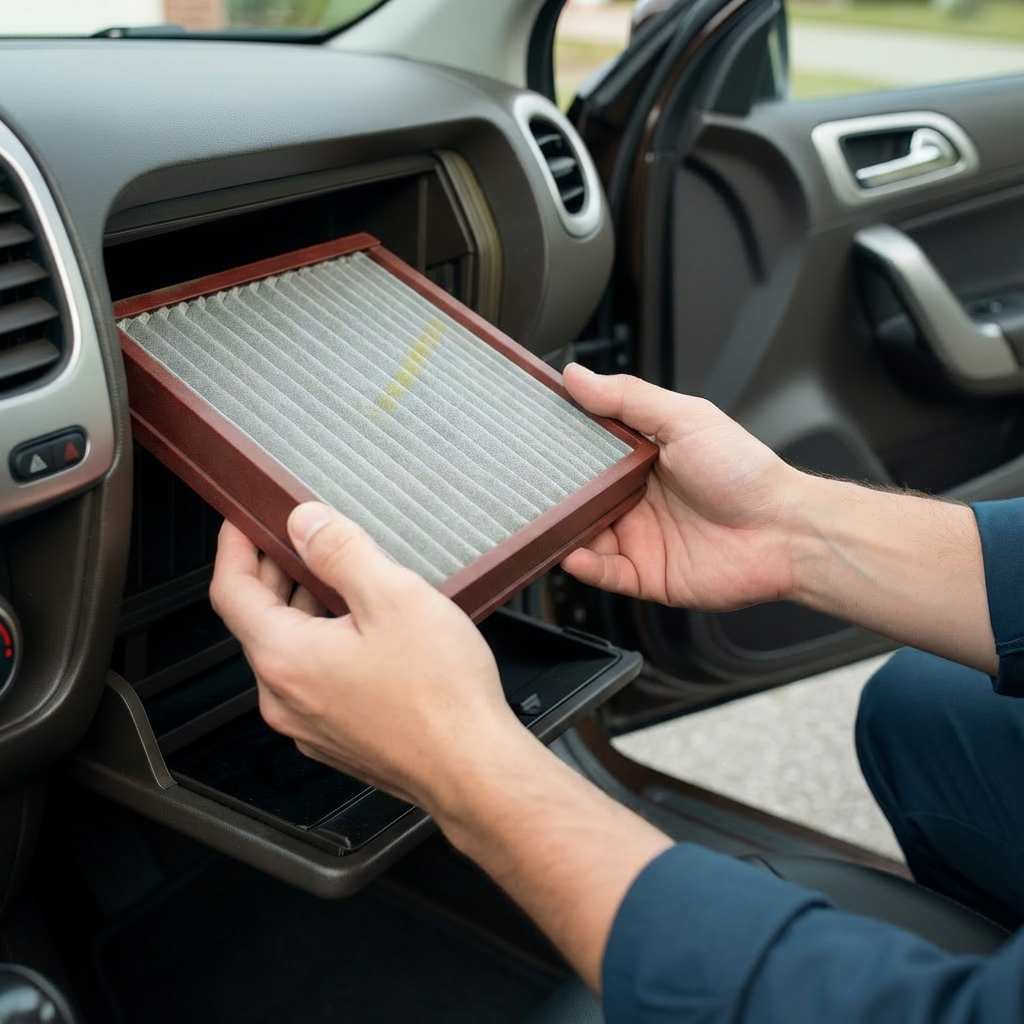
Step 4: Remove the Old Cabin Air Filter
Slide the old filter straight out of the housing. Pay attention to the airflow direction arrow printed on the filter, as the new filter must be installed the same way.
As you remove it, common signs of wear include:
✔ Heavy dust buildup
✔ Dark discoloration
✔ Musty or unpleasant odors
These are clear indicators replacement is needed.
Step 5: Inspect and Clean the Housing (Optional)
Before installing the new filter, take a moment to inspect the housing. If dust or debris is present, wipe it out with a dry cloth. Avoid using water or compressed air inside the housing.
This helps ensure proper airflow once the new filter is installed.
Step 6: Install the New Cabin Air Filter
Insert the new filter into the housing, making sure it matches the airflow direction of the old filter.
Confirm the following:
✔ The filter sits flush inside the housing
✔ The airflow arrow matches the housing direction
Reinstall the housing cover securely.
Step 7: Reassemble the Glove Box
Lift the glove box back into position and reattach any tabs or dampers that were released. Open and close the glove box to confirm it moves normally.
Once reassembled, the cabin air filter replacement is complete.
How Often Should a Cabin Air Filter Be Replaced?
Most manufacturers recommend replacing the cabin air filter every 12,000 to 15,000 miles, though driving conditions can shorten this interval.
Replacement is recommended if:
✔ Airflow from vents feels reduced
✔ You notice persistent odors
✔ The filter looks dark, dusty, or clogged when held up to light
Checking the filter during oil changes is a good habit.
Final Notes for Beginners
Replacing a cabin air filter requires no mechanical experience and is one of the easiest ways to improve cabin comfort. Taking your time and following each step carefully helps prevent broken clips and ensures proper installation.
This guide is provided for general educational purposes only and does not replace manufacturer service instructions or professional advice.