Dirty or corroded battery terminals are a common cause of starting problems, electrical issues, and reduced battery life. Fortunately, cleaning battery terminals is a simple maintenance task that almost any vehicle owner can perform safely with basic tools.
This guide walks you through the process step by step, assuming no prior mechanical experience.
Why Battery Terminals Need Cleaning
Battery terminals transfer electrical power from the battery to the vehicle. Over time, corrosion and residue build up on the terminals, restricting electrical flow.
✓ Corrosion increases electrical resistance
✓ Poor connections can prevent the engine from starting
✓ Electrical systems may behave unpredictably
✓ Battery lifespan can be shortened
Cleaning the terminals restores proper electrical contact and helps prevent future issues.
What You’ll Need Before You Start
You do not need specialized tools to complete this task.
✓ Safety gloves
✓ Eye protection
✓ Adjustable wrench or socket set
✓ Baking soda
✓ Clean water
✓ Small brush or old toothbrush
✓ Clean cloth or paper towels
Optional but helpful:
✓ Battery terminal cleaner or protectant spray
Safety First
Before working around a vehicle battery, basic safety precautions are important.
✓ Make sure the engine is turned off
✓ Remove the keys from the ignition
✓ Work in a well-ventilated area
✓ Avoid touching both battery terminals at the same time
Vehicle batteries produce electricity and gases, but when handled correctly, they are safe to work around.
Step 1: Locate the Battery
Open the hood and locate the battery. In most vehicles, it is positioned near the front of the engine bay and has two cables attached.
✓ The positive terminal is marked with a “+”
✓ The negative terminal is marked with a “–”
✓ Corrosion usually appears as white, blue, or green buildup
Step 2: Disconnect the Battery Cables
Always disconnect the negative terminal first.
✓ Loosen the nut on the negative (–) terminal
✓ Gently twist and lift the cable off the terminal
✓ Move the cable aside so it does not touch the battery
Next, disconnect the positive terminal.
✓ Loosen the nut on the positive (+) terminal
✓ Remove the cable and keep it away from metal surfaces
Disconnecting in this order reduces the risk of accidental short circuits.
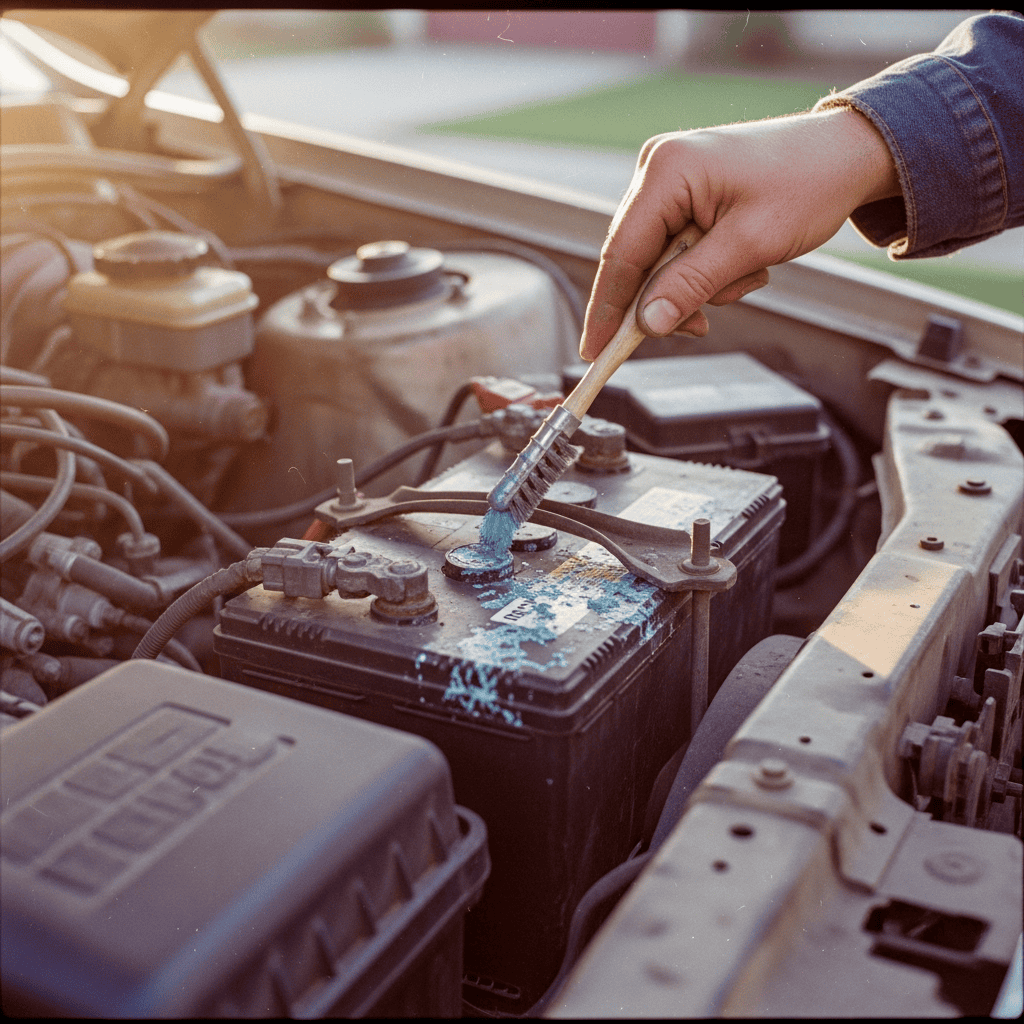
Step 3: Neutralize Corrosion
Mix a simple cleaning solution.
✓ Combine baking soda with a small amount of water
✓ Apply the mixture directly to the corroded areas
You may see bubbling—this is normal and indicates the corrosion is being neutralized.
Step 4: Scrub the Terminals
Using a brush, gently scrub the terminals and cable ends.
✓ Focus on areas with visible buildup
✓ Clean until the metal surface is clearly visible
✓ Avoid splashing solution onto other engine components
Take your time. Thorough cleaning ensures proper electrical contact.
Step 5: Rinse and Dry
Once the corrosion is removed, rinse the area.
✓ Pour a small amount of clean water over the terminals
✓ Wipe everything dry with a clean cloth
Moisture left behind can contribute to future corrosion, so drying is important.
Step 6: Reconnect the Battery Cables
Reconnect the battery in the reverse order.
✓ Attach the positive (+) cable first and tighten securely
✓ Attach the negative (–) cable second and tighten securely
The cables should feel snug but not over-tightened.
Step 7: Apply Protection (Optional)
To slow future corrosion:
✓ Apply a battery terminal protectant spray
✓ Lightly coat the terminal connections
This step is optional but recommended for long-term maintenance.
Signs the Cleaning Was Successful
After cleaning and reconnecting the battery, you should notice:
✓ Stronger, more reliable engine starts
✓ Reduced flickering or electrical issues
✓ No visible corrosion on the terminals
If problems persist, the battery itself may be weak or nearing replacement.
How Often Should Battery Terminals Be Cleaned?
✓ Inspect terminals every few months
✓ Clean whenever corrosion is visible
✓ Clean immediately if starting problems appear
Regular inspection helps prevent unexpected failures.
Final Notes
Cleaning battery terminals is a simple but effective maintenance task that improves reliability and extends battery life. It requires minimal tools, little time, and no advanced mechanical knowledge.
By keeping the battery connections clean, you reduce the risk of electrical problems and avoid unnecessary repair costs.