A dead battery is one of the most common reasons a vehicle will not start. Learning how to jump-start a vehicle safely allows drivers to get back on the road quickly without relying on professional assistance. This guide is written for first-time readers with no mechanical experience and explains each step clearly, safely, and in the correct order.A dead battery is one of the most common reasons a vehicle will not start. Knowing how to jump-start a vehicle safely can get you back on the road quickly without professional assistance. This guide is written for first-time readers with no mechanical experience and walks through each step clearly and safely.
When Jump-Starting Is Appropriate
Jump-starting is used when a vehicle battery has insufficient power to start the engine but is otherwise in usable condition.
✓ Engine will not crank or cranks very slowly
✓ Dashboard lights are dim or do not turn on
✓ Battery is discharged due to lights or accessories being left on
✓ Vehicle has been sitting unused for an extended period
If the battery is damaged, leaking, frozen, or severely corroded, do not attempt to jump-start it.
What You Will Need
Before starting, gather the following items.
✓ A working vehicle with a charged battery or a portable jump starter
✓ A set of jumper cables in good condition
✓ Safety gloves and eye protection
✓ A clear, safe area away from traffic
Both vehicles should be parked close enough for the cables to reach, but not touching.
Safety Precautions Before You Begin
Following basic safety steps reduces the risk of injury or damage.
✓ Turn off both vehicles completely
✓ Engage the parking brake on both vehicles
✓ Remove keys from the ignitions
✓ Ensure jumper cables are not tangled or damaged
✓ Keep metal tools and jewelry away from the battery
Never allow the jumper cable clamps to touch each other once connected to a battery.
Step 1: Identify Battery Terminals
Open the hood of each vehicle and locate the batteries.
✓ Positive terminal is marked with a “+” symbol
✓ Negative terminal is marked with a “–” symbol
✓ Terminals are usually red (positive) and black (negative)
Correct identification is critical to avoid electrical damage.
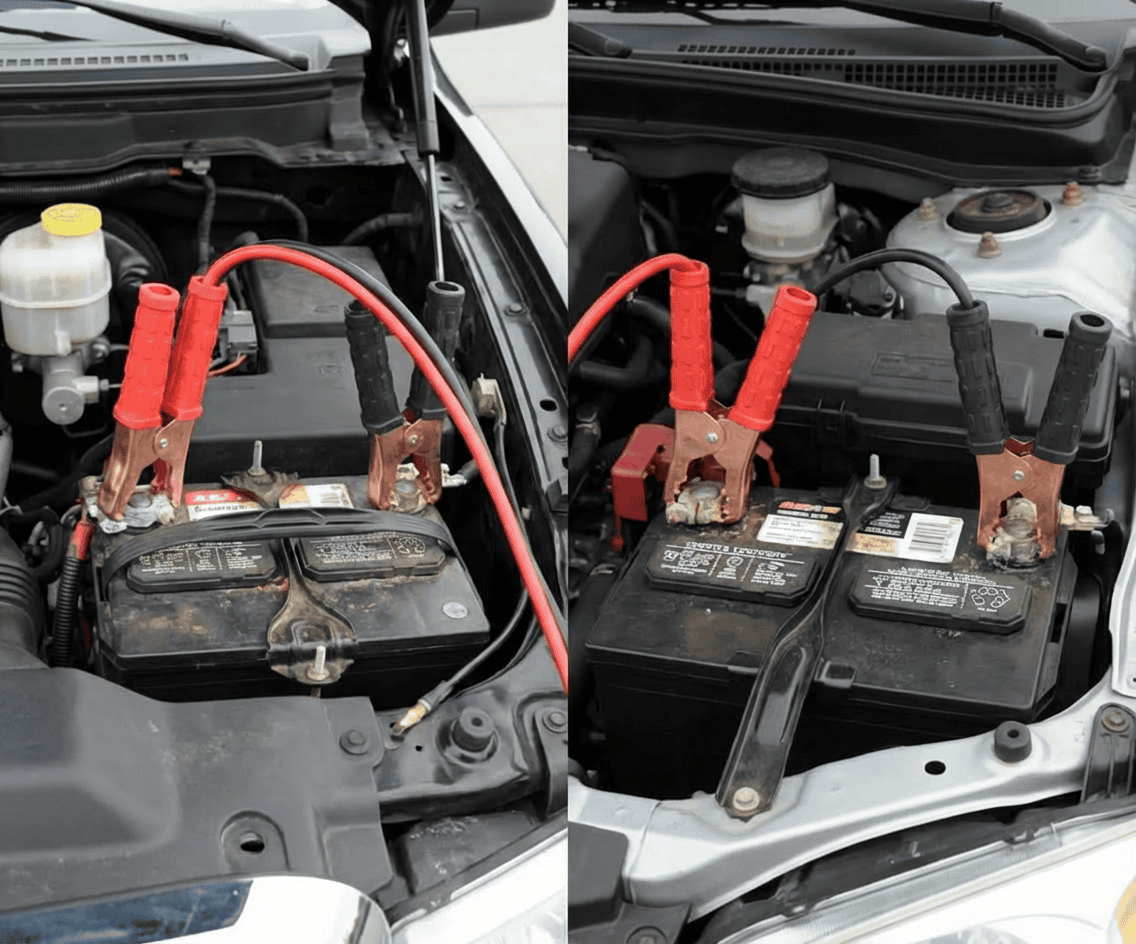
Step 2: Connect the Jumper Cables (Correct Order)
Always connect the cables in this exact sequence.
✓ Attach the red clamp to the positive (+) terminal of the dead battery
✓ Attach the other red clamp to the positive (+) terminal of the working battery
✓ Attach the black clamp to the negative (–) terminal of the working battery
✓ Attach the final black clamp to an unpainted metal surface on the dead vehicle’s engine or frame
Do not connect the final black clamp directly to the dead battery’s negative terminal.
Step 3: Start the Working Vehicle
Start the vehicle with the charged battery.
✓ Let it run for 2–5 minutes
✓ This allows power to transfer to the dead battery
✓ Avoid revving the engine excessively
During this time, check that the cables remain secure.
Step 4: Start the Dead Vehicle
After waiting a few minutes, attempt to start the vehicle with the dead battery.
✓ Turn the key normally
✓ If it does not start, wait another minute and try again
✓ Do not crank the engine continuously
Once the engine starts, let it idle.
Step 5: Disconnect the Jumper Cables (Reverse Order)
Remove the cables in the reverse order of connection.
✓ Remove the black clamp from the grounded metal surface
✓ Remove the black clamp from the working vehicle
✓ Remove the red clamp from the working vehicle
✓ Remove the red clamp from the jump-started vehicle
Keep the clamps from touching during removal.
Step 6: Keep the Vehicle Running
After jump-starting, allow the engine to run.
✓ Let the vehicle idle or drive for at least 20–30 minutes
✓ This helps recharge the battery
✓ Avoid turning off the engine immediately
If the vehicle stalls again, the battery may need replacement.
Common Mistakes to Avoid
✓ Reversing cable connections
✓ Allowing clamps to touch
✓ Jump-starting a damaged or frozen battery
✓ Turning off the engine too soon
Avoiding these mistakes prevents electrical damage and injury.
How Often Can a Vehicle Be Jump-Started?
Jump-starting should not be a regular solution.
✓ Frequent jump-starts indicate a weak battery
✓ Batteries typically last several years under normal use
✓ Repeated failures suggest charging or electrical issues
For long-term reliability, the battery and charging system should be inspected.
Final Notes
Knowing how to jump-start a vehicle is a valuable skill for any driver. The process is straightforward when done correctly and safely. By following the proper cable order and safety steps, most drivers can resolve a dead battery situation without assistance.
If jump-starting becomes frequent, addressing the underlying issue will save time and prevent future breakdowns.